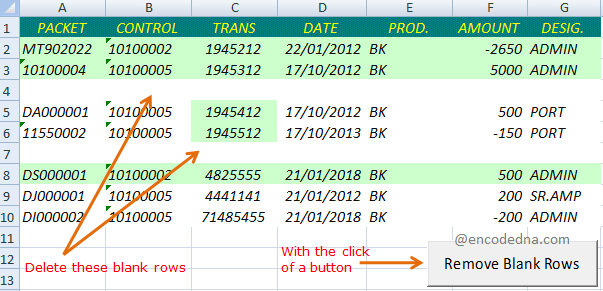
See the below image. The 3rd and 6th rows in the worksheet are blank rows.

Well, you can select the rows manually, one by one, and delete it. There are very few rows, so no problem at all. Now, imagine you have hundreds of rows and many rows are blank, which you want to delete quickly.
Doing the above process manually can be boring, irritating and time consuming.
There's an Excel built-in feature (I have explained it later in this post), which can actually make the job easy. However, first I’ll show a how to do this using a simple VBA macro. There are advantages of using a macro.
Macro to Delete Blank Rows with the click of Button
Let us assume, I have a button (an ActiveX Control) on my worksheet, along the dataset. I want to delete the blank rows (only) with the click of that button.
Here's the code.
Option Explicit

Private Sub CommandButton1_Click()
    Selection.SpecialCells(xlCellTypeBlanks).Select     ' Select all blank rows.
    Selection.Delete                                    ' Delete or remove the selected blank rows.
End Sub
The first line inside the button click event is important.
Selection.SpecialCells(xlCellTypeBlanks).Select
When you click the button, it selects all the rows, which are blank.
To delete a blank row, it has to select the row first. Therefore, I am using the Selection property.
The method SpecialCells() takes one parameter, the type of cell. Here we are interested in blank cells, therefore, I am using xlCellTypeBlanks.
Note: You can learn more about xlCellType here.
In the next line, I am using the Delete method to delete the row that is selected and because it is blank.
Do this and see what happens.
Comment the line Selection.Delete in the above macro and see what it does.
Remember: You cannot un-do this process, that is, if you have deleted the blank rows using this macro, you cannot get it back. Ctrl + z won’t work. The blank rows are just deleted.
Delete Blank Rows using “Go-To Special” feature
The Built-in Go-To Special feature is another simple way to delete or remove blank rows from your Excel worksheet.
Just follow these step.
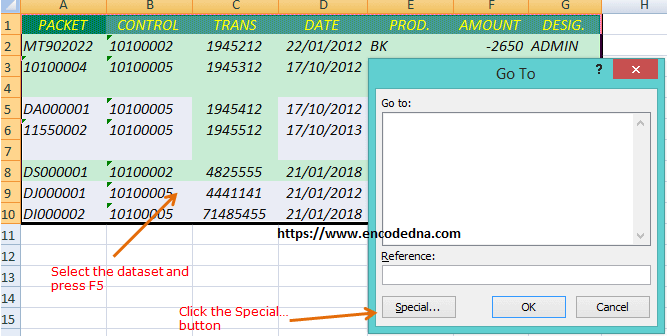
1) Select the dataset (the entire table) and press F5. It will open a small Go To dialog box. A small pop up window. Click the Special… button.

2) It now opens the Go To Special dialog box. Choose the option Blanks and click Ok button.

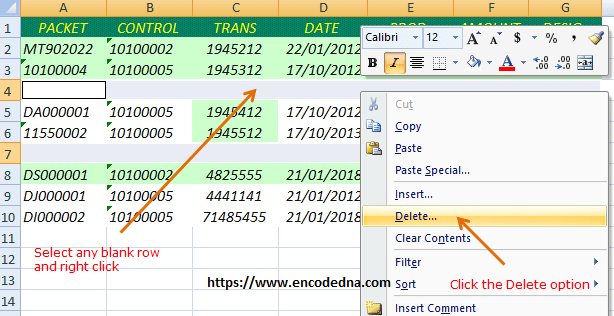
3) It will select all the blank rows. Right click any one selected blank row and click the Delete option.

4) This will open the Delete dialog box. Choose Entire row option and click Ok button.
It will delete all the blank rows instantly.
Note that there is an advantage however of using the Go-To Special feature over the VBA macro. Other than being simple to use, you can undo the delete process, by simply using Ctrl + z. But, you cannot roll back the process when using the macro.
However, there are few advantages of using the above macro:
1) It will save you a few clicks and time. You can remove/delete all the blank rows with just one click of a button. And guess what, its not difficult at all.
2) You can do this to multiple worksheets at once. For example, if you want to delete blank rows in another worksheet, simply do this.
Private Sub CommandButton1_Click()
    Worksheets("Sheet2").Select
    Selection.SpecialCells(xlCellTypeBlanks).Select
End Sub
Loop through all the worksheets in your workbook and follow the above procedure.
