You can anyway adjust the columns and rows without a macro or a program. However, its useful, if you want to automate your Excel job.
Note: I am assuming that you know how to work with VBA in Excel.
1) How to add Hyperlinks dynamically in Excel using VBA macro: In this post I have explained with a simple example on how to add hyperlinks in your Excel worksheet using a simple Macro.
2) Highlight an Entire Row in Excel Based on a Cell Value using VBA Conditional Formatting: Learn how to highlight or add colours to rows in Excel worksheets based on certain condition using VBA.
Using .ColumnWidth Property
The .ColumnWidth property in Excel returns or sets the width of a column. For example,
Debug.print Worksheets("Sheet1").Columns("A").ColumnWidth
The above code will return the width of the column in units. It will return a value even if there is no data in any cell in Column A. Each unit of column width is equal to the width of one character.
Similar example: How to check if a Cell in an Excel Worksheet has numbers using VBA
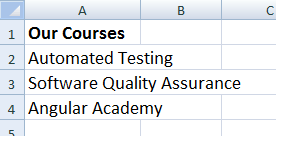
Here's another example. Look at the image below. The texts or the data in every cell in Column A overlaps with other column’s cells. The data may even hide inside the cell.

You can increase the width of the column using the .ColumnWidth property. For example, the code below doubles the width of column “A” (multiplied by 2).
Sub setColumnWidth()
    With Worksheets("Sheet1").Columns("A")
        .ColumnWidth = .ColumnWidth * 2
    End With
End Sub
It multiplies the default column width with 2. However, if you have a little more lengthy data, it may not give us the desired result. The data might still overlap.
The .AutoFit property can resolve this issue.
Using .AutoFit Method to Adjust Column Width
The .AutoFit property when used against columns can adjust the width of the column taking into account the max units in any cell and adjust the entire column accordingly.
Note: The .AutoFit works the same way for Rows.
Sub setColumnWidth()
    With Worksheets("Sheet1").Columns("A")
        .AutoFit
    End With
End SubSimilarly, you can apply the .AutoFit method on multiple columns. For example, if I want to auto-fit or auto-adjust columns through A to D, I'll do something like this,
With Worksheets("Sheet1").Columns("A:D")
    .AutoFit
End With
Using .RowHeight Property in VBA
The .RowHeight property in VBA returns the height of a row. It is measured in points.
Debug.Print Worksheets("Sheet1").Rows(3).RowHeight
The above code will return the height (in points) of the 3rd row.
Now, if I want to increase the height of the 3rd row, this is how I’ll do it:
Sub setRowHeight()
    With Worksheets("Sheet1").Rows(3)
        .RowHeight = 50
    End With
End Sub
I am increasing the height of the row by 50 points. Or, you can double the row height like this:
Sub setRowHeight()
    With Worksheets("Sheet1").Rows(3)
        .RowHeight = .RowHeight * 2
    End With
End Sub
Using .AutoFit Method to Adjust Rows
Use the .AutoFit method to auto-adjust the rows according to the data (also depends upon the style such as font size) it contains. For example, if you want to adjust the 3rd row in sheet1, you can do this …
Sub setRowHeight()
    With Worksheets("Sheet1").Rows(3)
        .AutoFit
    End With
End Sub