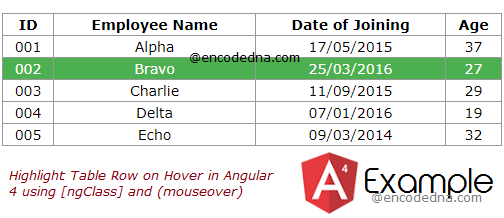
The solution here uses ngFor directive to populate an HTML Table with data. The data is in a JSON array, which I have defined in my component class.
First, create an Angular project.
The Application Component
Open the app.component.ts file and copy the below code into it.
import { Component, OnInit } from '@angular/core';

@Component({
  selector: 'app-root',
  templateUrl: './app.component.html',
  styleUrls: ['./app.component.css']
})
export class AppComponent {
  title = 'Highlight Table Row on Hover';

  ngOnInit () {  }

  // CREATE A JSON ARRAY.
  employees: any [] = [
    { 'id': '001', 'name': 'Alpha', 'joinDate': '05/17/2015', 'age': 37 },
    { 'id': '002', 'name': 'Bravo', 'joinDate': '03/25/2016', 'age': 27 },
    { 'id': '003', 'name': 'Charlie', 'joinDate': '09/11/2015', 'age': 29 },
    { 'id': '004', 'name': 'Delta', 'joinDate': '01/07/2016', 'age': 19 },
    { 'id': '005', 'name': 'Echo', 'joinDate': '03/09/2014', 'age': 32 }
  ];

  public selectedName:any;

  public highlightRow(emp) {
    this.selectedName = emp.name;
  }
}
I have defined an array named employees with few data in it. I’ll bind the array to a table using ngFor inside my applications (HTML) template. (see below)
I also have a "public" method named highlightRow() and it takes a parameter.
public highlightRow(emp) { }
This method is called by a (mouseover) event, attached to the HTML table. See the template section below.
The parameter emp will have the data in the row (row that is hovered or selected). For example if I hover (the mouse) over the 3rd row in the table and use the console window to see the emp values, it would show this …

The data is then assigned to a public variable named selectedName. I’ll use the variable’s value as a condition inside the [ngClass] directive, attached to the table. See the template below.
HTML Template
Using ngFor to loop through your data and ngClass to conditionally apply a CSS class.
<div style="text-align:center;width:500px;">
    <table *ngIf="employees">
        <thead>
            <tr>
                <th>ID</th>
                    <th>Employee Name</th>
                        <th>Date of Joining</th>
                            <th>Age</th>
            </tr>
        </thead>
        <tbody>
            <tr *ngFor="let emp of employees;" (mouseover)="highlightRow(emp)"
                [ngClass] = "{'highlight' : emp.name == selectedName}">

                <td>{{emp.id}}</td>
                    <td>{{emp.name}}</td>
                        <td>{{emp.joinDate | date : 'dd/MM/yyyy'}}</td>
                            <td>{{emp.age}}</td>
            </tr>
        </tbody>
    </table>
</div>
The (mouseover) event calls the method highlightRow() (which I have defined in my component class). The method takes a parameter and I am passing the emp variable to the method.
The Angular [ngClass] is a built-in directive, which you can use to style an element based on some "condition".
[ngClass] = "{'highlight' : emp.name == selectedName}"
What this mean?
Assign the ".highlight" class or apply style (using the highlight class) to the element if "emp.name" is equal to selectedName. I have defined the variable selectedName in my component class.
This is nice. It saves time and some extra effort to write a separate script for conditionally applying style to an element.
Therefore, when the employee name in the row matches with the value in the selectedName variable, it would highlight the entire row.
Note: I have defined the highlight class in the app.components.css file. See the style section below.
Applying Style to the Table in CSS
Now let’s add some style to table along with class that will highlight the rows. Open app.components.css file in your project folder. Copy and paste the below code to the file:
table {
    width: 100%;
}
table, th, td {
    border: solid 1px #999999;
    border-collapse: collapse;
    padding: 2px 3px;
    text-align: center;
}
th {
    font-weight: bold;
}

table tr.highlight {
    background-color: #4CAF50 !important;
    color: #ffffff;
}
What else?
Alternatively, you can use the (click) event with *ngFor to highlight a selected row. Simply change the (mouseover) event with the (click) event. Like this …
<tr *ngFor="let emp of employees;" (click)="highlightRow(emp)"
    [ngClass] = "{'highlight' : emp.name == selectedName}">

    ...
</tr>
The remaining code remains the same.
You may also use the HTML <ul> tag or unordered HTML list tag instead of a table to achieve a similar result. For example,
<ul *ngFor="let emp of employees" (mouseover)="highlightRow(emp)"
    [ngClass] = "{'highlight' : emp.name == selectedName}">

    <li>{{ emp.name }} | {{ emp.joinDate }} </li>
</ul>
