
Without z-index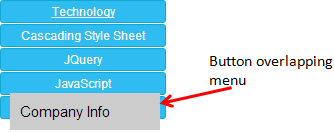 With z-index
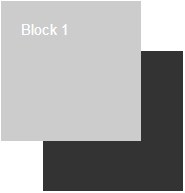
This normally happens with elements whose position has been explicitly changed from its default value. Imagine you have multiple elements stacked together and whose position has been set to either absolute or relative. A typical overlapping element will look like this.
The above image shows 2 DIV elements whose position is set as absolute with different top and left values.
<html>
<head>
    <style>
        .div1 {
            background-color:#CCC;
            color:#FFF;
            position:absolute;
            top:0;
            width: 100px;
            height: 100px;
            padding: 3px;
            margin: 10px;
        }
        .div2 {
            background-color:#333;
            color:#FFF;
            position:absolute;
            top:50px;
            left:50px;
            width: 100px;
            height: 100px;
            padding: 3px;
        }
    </style>
</head>
<body>
    <div class="div1">Block 1</div>
    <div class="div2">Block 2</div>
</body>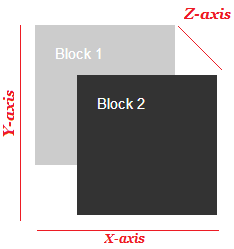
</html>In fact this is not an issue at all. Rather a normal design pattern with 3 dimensional features. We have defined the 2 dimensions in the form of top and left denoting the X and Y axis.
The 3rd dimension or the Z axis in the picture (below) is the order in which the elements have been place.
Property “z-index”
Syntax:
div { z-index:1 }
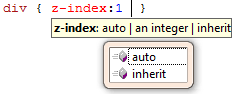
• Generally this property will be defined using an integer value either +ve or -ve.
• If nothing is defined, the value is considered a 0 (zero). This is in fact the default value of a z-index property.
• It can also inherit values from its parent element, if defined as inherit.
Implementing “z-index” property
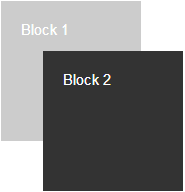
To see this property in action we will use the above example with 2 blocks (or DIVs). Inside the markup we have set the positions of the DIV elements as absolute. And it is normal to see that the 2nd DIV element has overlapped the first one, since the default z-index value is 0.
To show the 1st DIV at the front, we will set its z-index as 1 without altering the 2nd DIV’s z-index, which remains 0.
<html>
<head>
    <style>
        .div1 {
            background-color: #CCC;
            color: #FFF;
            position: absolute;
            top: 0;
            width: 100px;
            height: 100px;
            padding: 3px;
            margin: 10px;
            z-index: 1;
        }
        .div2 {
            background-color: #333;
            color: #FFF;
            position: absolute;
            top: 50px;
            left: 50px;
            width: 100px;
            height: 100px;
            padding: 3px;
        }
    </style>
</head>
<body>
    <div class="div1">Block 1</div>
    <div class="div2">Block 2</div>
</body>
</html>Output
You can try this: In the above example, change the z-index property to -1 (or zero) and see the result. Alternatively, you can switch the z-index property between the elements to see a different result.
Text on Image
Overlapping is not always an issue when you have cool designs in your mind. The usefullness of z-index property can be seen on web pages which showcases images intensionally overlapped with a text.
👉 You may like to article How to add text on an image and save using CSS and JavaScript
Take a look at this example.
<html>
<head>
    <title>CSS Z-Index Property</title>
    <style>
    	div {
            margin: 5px;
            font: 15px Calibri;
        }
        .div3 {
            position: absolute;
            top: 0;
        }
        .div4 {
            color: #FFF;
            position: relative;
            top: 100px;
            left: 20px;
            z-index: 1;
        }
    </style>
</head>
<body>
    <div class="div3">
        <img src="../../images/theme/easy-image-resizer.jpg"
            width="200px" height="200px" alt="" />
    </div>

    <!--This text will show over the image.-->
    <div class="div4">Life is beautiful</div>
</body>
</html>In the above example we have reordered the stack, to make sure that the text in div4 remains on top of the image, since the element div4 has a higher z-index value.
Do this... Change z-index: 1 to z-index: -1 and see what happens.
Using z-index you can reorder or rearrange the elements on a web page, making it more interactive and user friendly. CSS can sometimes be a little tricky and understanding its properties will help your implemnent it properly.