
Last Updated: 8th March 2026
There are many simple ways to center an image using CSS. In this tutorial, I'll show you four common and widely used methods for centering an image with CSS.
1) Using CSS grid
In the method, the image is inside a DIV element, which serves as a container. The container's display property is set as grid. It also has the place-items property with its value set as center.
The container (a DIV in this example), must have a height defined. Without height, the grid container will only grow to the size of its content, so vertical alignment won't be noticeable.
Remember: All items (elements) inside the container will be centered.
<!DOCTYPE html>
<html>
<head>
<style>
    img { border: none; }
    .center {
      display: grid;
      place-items: center;
      height: 200px;
      border: solid 1px #ddd;
    }
</style>
</head>

<body>
  <div class="center">
      <img src='https://www.encodedna.com/images/theme/css.png'>
  </div>
</body>
</html>2) Using Flexbox
This second method uses Flexbox layout to center the image. Here the parent container (in which the image is placed) is a flex container and it use the alignment properties.
<!DOCTYPE html>
<html>
<head>
<style>
    img { border: none; }
    .center {
      display: flex;
      justify-content: center;      /* horizontal center */
      align-items: center;          /* vertical center */
      height: 200px;
      border: solid 1px #ddd;
    }
</style>
</head>

<body>
  <div class="center">
      <img src='https://www.encodedna.com/images/theme/css.png' alt='CSS'>
  </div>
</body>
</html>Similar Example: Forget Absolute - Flexbox Makes Top-Right Positioning Effortless
3) Using margin
The margin property creates space around an element. To center the image, from left and right or horizontally, I have set the margin-left and margin-right as auto. Or, you can simply use margin: 0 auto;. Both are same.
This is one of oldest CSS method for centering an element. It is still relevant.
Remember:
i) It only centers the image horizontally not vertically. The property can be applied directly to the <img /> element.
ii) It also requires display: block to make the image element behave like a block element. Remove "display: block" and see what happens.
<!DOCTYPE html>
<html>
<head>
<style>
    img { border: none; }
    .center {
        display: block;
        margin-left: auto;
        margin-right: auto;

        /*  or simply use
        margin: 0 auto; */
    }
</style>
</head>

<body>
  <img class="center" src='https://www.encodedna.com/images/theme/css.png' alt='CSS'>
</body>
</html>👉 You may also like this... How to rotate an Image using pure CSS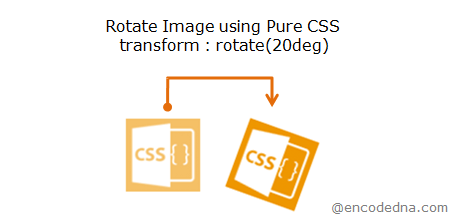
What does "auto" do in margin: 0 auto (or margin-left and margin-right)
The value auto automatically sets the left and right margin of an element at the center of a container. However, I am not using an element as a container. The image is displayed at the center of the page (the <body>).
4) Using position: fixed and transform
Unlike the previous examples, here I am going to place the image exactly at the center of the screen. This method positions the image relative to the viewport and then shifts it back by half of its own size.
Remember: Since the position is fixed, the image stays fixed on the screen even when you scroll the page up and down.
<!DOCTYPE html>
<html>
<head>
<style>
  img { border: none; }

  .center {
    display: block;
    position: fixed;		/* or absolute */
    top: 50%;
    left: 50%;
    transform: translate(-50%, -50%);
  }
</style>
</head>

<body>
  <img class="center" src='https://www.encodedna.com/images/theme/css.png' alt='CSS Tutorial'>
</body>
</html>
Not just image, you can the above methods (examples) to center any element. See this example.