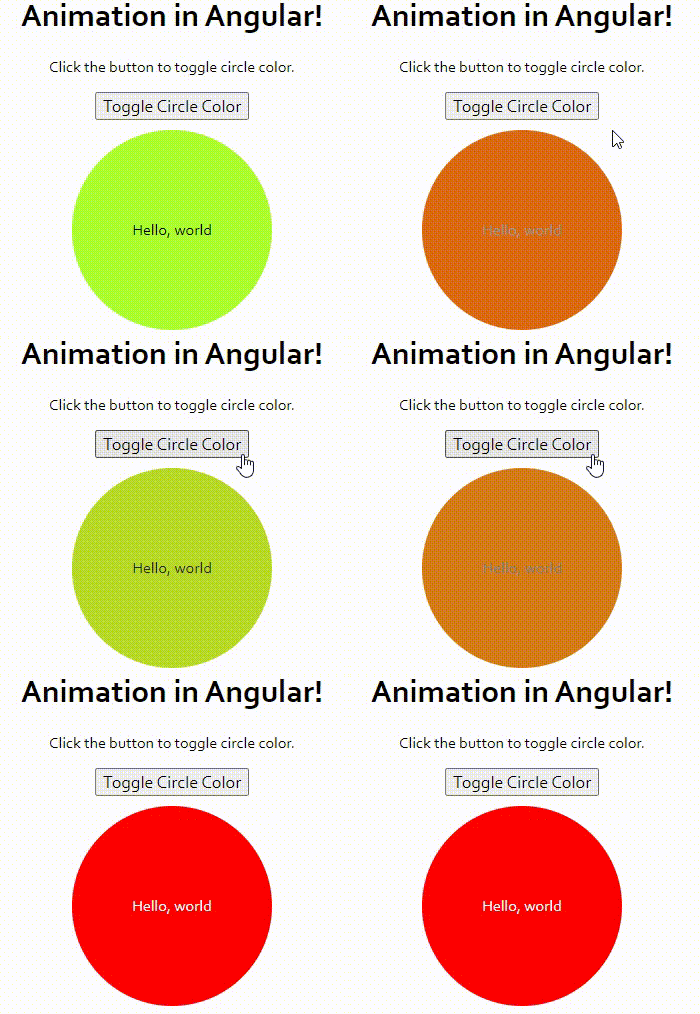
It all started with the marquee texts on web pages, moving from right to left or up and down etc. That was a long time ago. Now, animations are not just about moving texts or images. You can create anything you want to grab user attention. You don’t need fancy tools to create animations. All you’ll need is some skill using CSS or Cascading Style Sheets.
So, let’s get on with the example.
Setup Angular
Its an angular project. Therefore, you need to first “setup” the development environment. Download and install Node.js (latest version) and NPM on your machine.
Next, install Angular CLI. Use this command.
npm install -g @angular/cli
Reference: Setting up the local environment and workspace
Note: I am using Angular 15. Animations are actually available since Angular 4.
Create angular project
To create the project, open cmd prompt, go to the folder where you want to create the project and run this command.
ng new animation
It will create a folder named animation and this will have all the files for the project. Go to the folder… cd/animation
Open the project in the editor, which editor you are using. I am using VS-Code.
Setting up animation
To work with animations in Angular, you’ll have to first import the BrowserAnimationsModule to the root module and include it into the modules imports array.
import { NgModule } from '@angular/core';
import { BrowserModule } from '@angular/platform-browser';

import { AppRoutingModule } from './app-routing.module';
import { AppComponent } from './app.component';
import { BrowserAnimationsModule } from '@angular/platform-browser/animations';

@NgModule({
  declarations: [
    AppComponent
  ],
  imports: [
    BrowserModule,
    AppRoutingModule,
    BrowserAnimationsModule
  ],
  providers: [],
  bootstrap: [AppComponent]
})
export class AppModule { }
Create animation component
Open app.components.ts file in the editor. Copy/Paste the below code in it.
import { Component } from '@angular/core';
import {trigger, state, style, animate, transition} from '@angular/animations';

@Component({
  selector: 'app-root',
  templateUrl: './app.component.html',
  styleUrls: ['./app.component.less'],
  animations:
  [
    trigger('changeBackground',
    [
      state ('green', style({'background-color':'greenyellow', 'color' : 'black'})),
      state ('red', style({'background-color':'red', 'color' : 'white'})),
      transition ('* => *', animate(1000))
    ])
  ]
})
export class AppComponent {
  title = 'Animation in Angular';

  color: string='greenyellow';
  changeColor(){
    // alert(this.color)
    this.color = this.color === 'greenyellow' ? this.color = 'red' : this.color = 'greenyellow';
  }
}
In angular, animations work by listening to "state" changes. These changes are triggered by the trigger() function.
See the above code again. The animations[] array has a trigger named changeBackground and it has "two" different states (or stages).
animations:
  [
    trigger('changeBackground',
    [
      state ('green', style({'background-color':'greenyellow', 'color' : 'black'})),
      state ('red', style({'background-color':'red', 'color' : 'white'})),
      transition ('* => *', animate(1000))
    ])
  ]
The two states are defined to toggle between two different colours. So, the first click turns the circle (or any element) greenyellow and the next click runs the circle red.
The trigger also has the transition() function. It has "two" parameters (or arguments).
• * => * - this is the 1st parameter to capture state change
• animate() function – the 2nd parameter is the animate() function, which has the value 1000 (meaning 1000 milliseconds or 1 second). Note: You can be more specific when defining the value. For example, "animate('2000ms')". The value should be inside single or double quotes.
Now, there is also a calling function named changeColor(). This is a user defined function.
changeColor() {
…
}
This function is called from the template, when someone clicks a button. So, button’s click event calls this function.
Our component is ready. Let's now create the application template.
Create template and attach animation
We’ll attach the animation component to the template. A template in Angular is where we add HTML elements and CSS etc.
So, open app.component.html file and copy the below code into it.
<!DOCTYPE html>

<style>
  .container {
    text-align: center;
    width: 500px;
    border: solid 1px #000;
  }

  input { font-size: 18px; cursor: pointer; }

  .circle {
    width: 200px;
    height: 200px;
    line-height: 200px;
    border-radius: 50%;
    background-color: greenyellow;
    cursor: pointer;
    display: block;
    margin: 10px auto;
  }
</style>

<h1>{{title}}!</h1>

<div class="container">
  <p>Click the button to toggle circle colour.</p>
  <div>
    <input type="button" id="bt" value="Toggle Circle Colour" (click)='changeColor()'>
  </div>

  <span class="circle" [@changeBackground]='color'Hello, world</span>
</div>
Since, a Circle will change the colour in this example, we’ll create a circle using CSS. See the CSS class .circle and it is attached to a <span> element.
The <span> also the trigger ([@changeBackground]) that I have defined the component file.
Launch the server
We’ll execute the project by launching the server. In the command prompt run this command.
ng serve --o
