
We all hate unwanted popup windows. However, it is one of most useful and effective online advertising tools ever designed. Yes, it is effective. Keeping this in mind, modern browsers have made provisions for blocking unwanted or all types of popup windows, ultimately giving the user complete authority to allow or disallow these windows to appear.
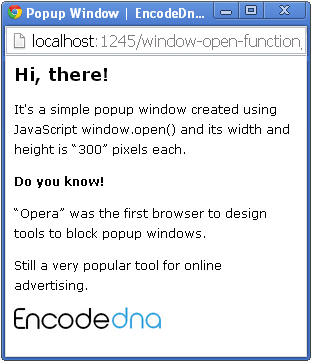
👉 Do you know: The first browser ever to design and implement tools to block popup windows was Opera.
Anyways, we are not going to discuss in depth about the pros and cons of popup windows, but to understand how windows can be opened either as a new window or in a new tab.
JavaScript window open() method has many features which we are going to discuss in these articles.
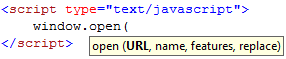
Syntax:
window.open (url, name, features, replace)
<html>
<head></head>
<body>
    <input type="button" value="Click Me" onclick="openWindow()" />
</body>
<script type="text/javascript">
    function openWindow() {
        var win = window.open('popupwindow.htm');
        win.focus();
    }
</script>
</html>
Property url
This specifies the URL or the location of the web page which is to be opened. An URL (Uniform Resource Locator) is the web address which you can see in the address bar of your browser. If you do not mention the URL in the function, then it will open a new blank window.
In the above example I am opening a new window by clicking a button. In addition, I have specified the URL or the page which is to be opened in the window.
Property name
You can give the new a window a name, using this parameter. It works as an identifier meaning if a window has been opened with a specific name, then clicking the button again will refresh the already opened window showing new contents. Without the name, the function will open a new window with every button click.
let win = window.open('popupwindow.htm', 'New Window'); win.focus();
Also, this parameter can be used to set the windows target attribute like _blank, _top, _self, _top.
Using the above example, I'll now replace New Window with one of the target attributes.
let win = window.open('popupwindow.htm', '_blank');
and
let win = window.open('popupwindow.htm', '_parent');
Property feature
Using the feature parameter, you can define the necessary features of the newly created or opened window. This actually takes a collection of string as parameters separated by a comma. A windows feature can be like its width and height and how it is positioned on the screen. Below are the lists of features which are commonly used.
I would recommend that you read the restrictions imposed on these features in About Window Restrictions
Using feature left and top
Its values are in pixels and you can use the left and right (also X coordinate and Y coordinate) to position the window on the screen. Many browsers do not support this feature anymore.
let win = window.open('popupwindow.htm', 'New Window','top=70,left=500');
Using feature width and height
Popup windows come in a variety of sizes depending on the use of these windows. To adjust the size from small to big, use these features. And also these values are in pixels.
let win = window.open('popupwindow.htm', 'New Window','width=300,height=300');
Using feature resizable
Accepts values like 0 and 1 or yes and no to specify if the window can be resized once opened. Now, this behavior varies from browser to browser. Try this in different browsers, particularly with Internet Explorer and see the result. The default is 0 or no.
let win = window.open('popupwindow.htm', 'New Window','width=300,height=300,top=70,left=500,resizable=no');
Using feature scrollbars
Accepts values like 0 and 1 or yes and no to specify if the page of the newly opened window can be scrolled or not. Again, try different browsers to check the result. Check this feature after reducing the width and height of the window. This will give a clear picture of how it works.
let win = window.open('popupwindow.htm', 'New Window','width=300,height=300,top=70,left=500,scrollbars=yes');
Using feature status
Set value 0 and 1 or yes and no to specify if the window will show a status bar at the bottom. The status bar provides many security features available with the browser. Hiding the status bar is not recommended, since it can deceive the users in many ways.
let win = window.open('popupwindow.htm', 'New Window','width=300,height=300,top=70,left=500,status=no);
Using feature menubar
This will specify if the browser’s menu bar will be displayed or not. The values are 0 and 1 or yes or no depending upon the requirement.
let win = window.open('popupwindow.htm', 'New Window','width=300,height=300,top=70,left=500,resizable=0,menubar=yes');
Property replace
This feature’s activity is reflected in keeping the history of pages browsed by a user. Your browser maintains hour by hour history of your entire browser activities. It takes Boolean values like true or false. When set as true, it will replace current history with the new one and if set as false, it will create a new entry in the browser history.
<html>
<head></head>
<body>
    <input type="button" value="Click Me" onclick="openMultipleWindows()" />
</body>
<script type="text/javascript">
    function openMultipleWindows() {
        var win1 = window.open('popupwindow.htm', 'Win 1',
            'width=600, height=600, top=70, left=100, resizable=1, menubar=yes', true);
        var win2 = window.open('popupwindow.htm', 'Win 2',
            'width=600, height=600, top=70, left=100, resizable=1, menubar=yes', true);
    }
</script>
</html>